The Fortified Manor is a fantastic piece of scenery from Citadel and Games Workshop. Unfortunately it is no longer available, except on eBay for exhortionist prices. It used to be very good value for money considering all the components that you got: A watchtower and a chapel, a connecting piece to make a manor, and a set or walls & fences.
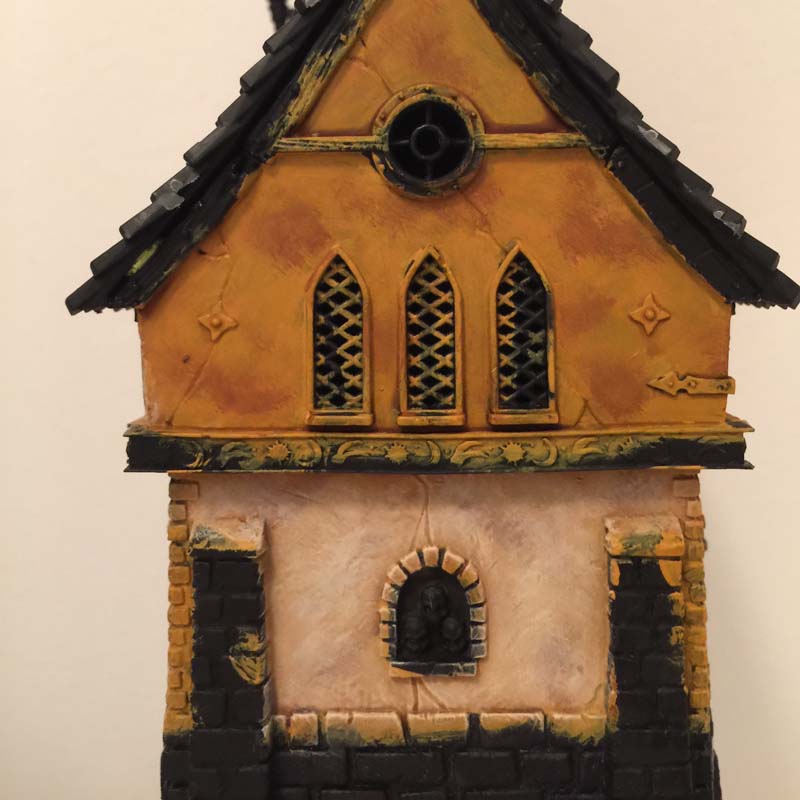
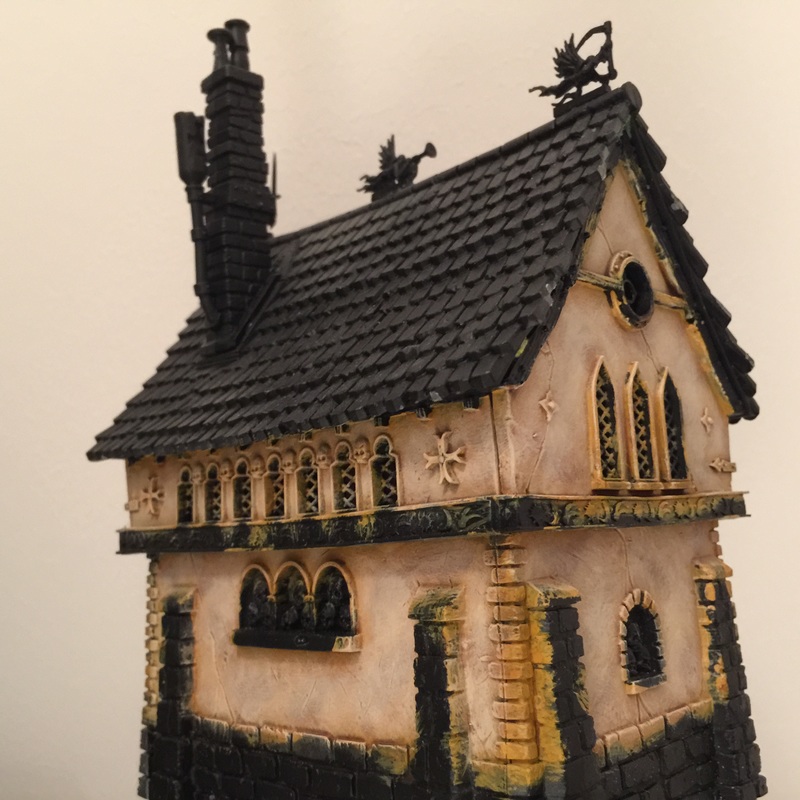
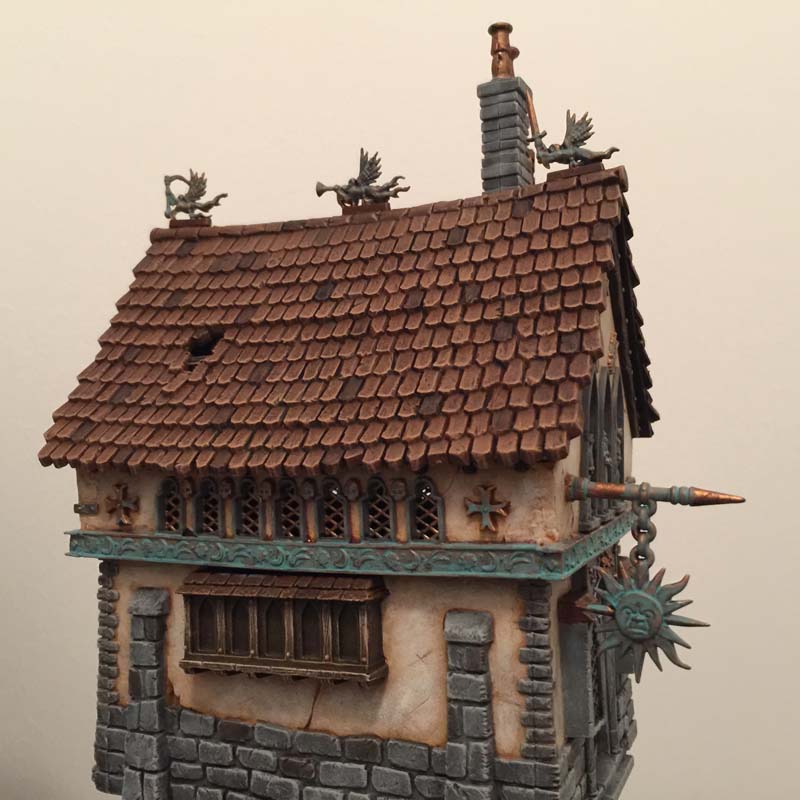
I was lucky enough to pick one up before they ran out of stock and recently painted it. Here is a picture of the finished manor:
I was lucky enough to pick one up before they ran out of stock and recently painted it. Here is a picture of the finished manor:
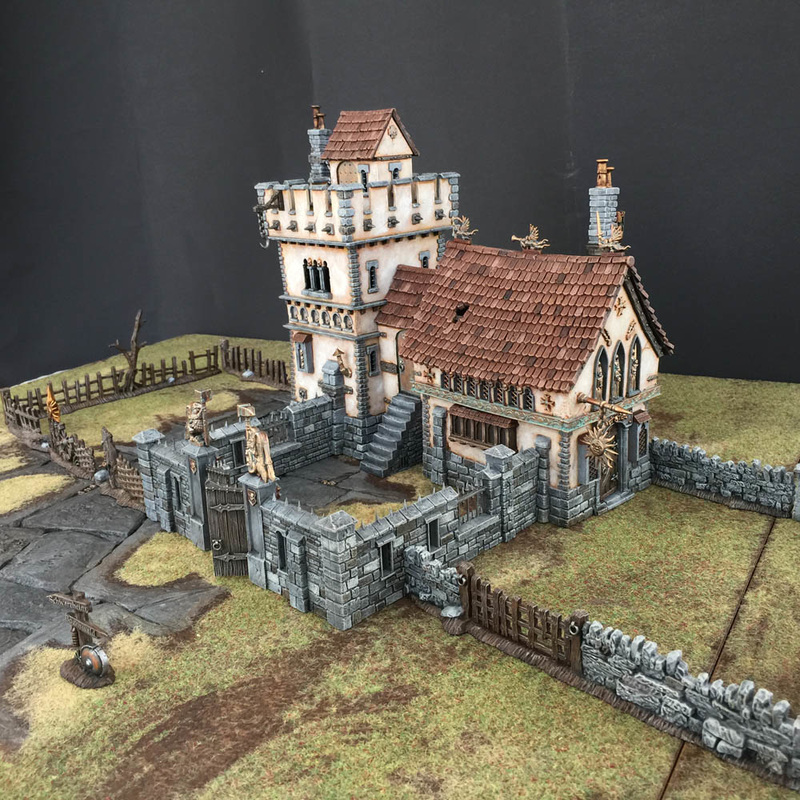
This is what I call the "clean" version. It does have some weathering done, though. The bronze parts have verdigris and some of the metal is painted to look worn and dirty:
|
|
I plan to weather the whole piece with stains from where rain has affected it on the plaster, more rust and dirt on and around the metal parts, and so forth. I will probably detail that process too later in an other blog post, but for now, we will focus on painting this to a "clean" version.
Now, before starting any painting, you clean, assemble and base coat the whole piece. I would strongly suggest spraying the whole thing black. I find that for building that black work much better as a base coat. Buildings in general have darker tones and black is more forgiving, which is not a bad thing when you have that much plastic to paint.
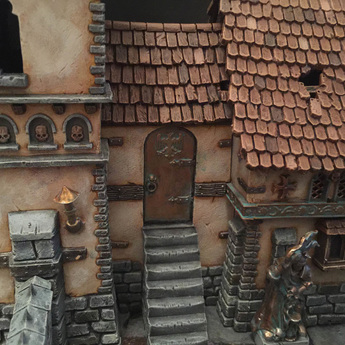
Now, in some cases, painting something like this in pieces might be good advice, but in this case, I would advise the opposite. Assemble first, then paint. The reason for this is all the unsightly gaps on the model, most apparent around the corners of the tower and chapel. You want to cover these with green stuff. Whether you use the solid green stuff or the liquid depends on the gap and what you are covering. Here is an example of a gap like this:
Now, before starting any painting, you clean, assemble and base coat the whole piece. I would strongly suggest spraying the whole thing black. I find that for building that black work much better as a base coat. Buildings in general have darker tones and black is more forgiving, which is not a bad thing when you have that much plastic to paint.
Now, in some cases, painting something like this in pieces might be good advice, but in this case, I would advise the opposite. Assemble first, then paint. The reason for this is all the unsightly gaps on the model, most apparent around the corners of the tower and chapel. You want to cover these with green stuff. Whether you use the solid green stuff or the liquid depends on the gap and what you are covering. Here is an example of a gap like this:

|
You do not strictly need to cover these, but you might regret it later if you do not do it before painting. I did regret that, as I started painting the plaster first and had to redo it around these gaps after filling them up with green stuff.
|
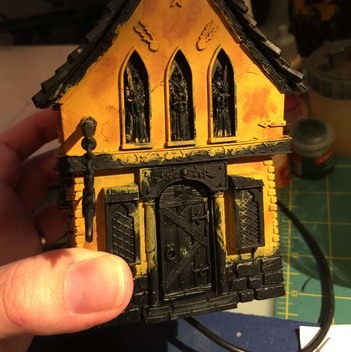
For this post, I thought I'd cover painting the plaster, which is what I did first. The reason I started with this is simple - it is messy, and you would get paint on other details if you did it after anything else. When painting the plaster, I used these colors:

Averland Sunset
|

Agrax Earthshade
|

Mournfang Brown
|

Ushabti Bone
|

White Scar
|
You also need a large brush for base coating, a medium sized drybrush and whatever brush you use for washing.
Painting the plaster is basically made in five steps, with emphasis on the final two:
1, a first layer of yellow
2, a heavy wash of brown
3, splotches and irregularities in brown
4, several layers of heavy drybrushing bone color
5, more selective drybrush of white
Painting the plaster is basically made in five steps, with emphasis on the final two:
1, a first layer of yellow
2, a heavy wash of brown
3, splotches and irregularities in brown
4, several layers of heavy drybrushing bone color
5, more selective drybrush of white
|
Step 1 - first layer
Paint the whole plaster area with Averland Sunset. Make sure you cover the surface well, but it does not matter if you spill on other surfaces - that can be cleaned up later. Also, you might need to do this in two layers. You do not need to thin down your paint, but be careful not too cover too thickly - you want to keep the surface details, the small cracks and so forth. This layer does not need to be super smooth like you want on a miniature, as we will cover this layer with so many thin thin layers anyway, and drybrushing makes the surface look more dry, counter acting any shinyness from this layer. Step 2 - wash Wash the whole surface with Agrax Earthshade. The purpose here is not only shading, but also to create variation. Splotch it on - it does not need to be smooth, quite the opposite - variation is good in this case. Step 3 - "splotching and spots" With watered down (50/50) mournfang or bestial brown, add irregular splotches/spots across the surface. This will look terrible at this point - don't worry! |
|
|
Step 4 - heavy drybrush
Grab your drybrush and warm up your wrist - this will take a bit of time and effort. Your drybrush should not be too small. Make sure you get almost all the paint out of your brush before you start drybrushing. You want many thin thin thin layers. The more the better. This is all about the small small irregularities, and the thin layers let the splotches and washes show through enough to create an interesting surface. Focus on the open areas, and only touch the edges and "shadowed" parts lightly. But do touch the deep crevices between stones and close to the edge - don't leave anything completely yellow. I use a circular motion when drybrushing flat areas like these, I think the effect looks the most realistic. I use the same motion for stones. Keep at it until you are satisfied that it looks good. This will take some time and your wrist may hurt afterwards. I did this over more than one session... paint something else inbetween! When this layer is done, you could call it quits and just be done with the plaster - you will probably feel like enough is enough. But the final layer will do that little extra to. Also, at this point, you might want to carefully go over some of the cracks in the plaster with a very small amount of agrax wash again. This is not necessary, and even risky, but looks nice. Step 5 - selective white drybrush OK, the final step is to use a white color to add a little extra depth and highlighting to the areas that should be hit by the most light. Again, very little paint on your drybrush. This time focus on the areas in the middle of the plaster and the areas where the sun would shine the most. Lightly brush these areas with the drybrush. Don't be completely even with this layer either - irregularities are good, even now. The last picture to the right shows how it could look like when you are done with the plaster. I never took a picture at that actual time... That is enough for this part of this guide. Stay tuned for part II... Also, like "Jester Painting Studio" on facebook to receive updates when new blog posts are posted! (just press the like button below to do this!) |
|
 RSS Feed
