This is a bit of a story and a bit of a guide on how to build a paint shelf. This was made mainly for citadel paints, but could with slight modifications be done for Vallejo paints for example, or a mix of different brands. You just adapt the shelving height to accommodate different bottle heights.
| I have been searching for a good solution for paint storage for some time now. I have tried to find something which fulfills these conditions: - Can store up to a 100 paints. - That is efficient and takes up little space per paint. - That shows the labels and bottles clearly so that I can find the paint I want fast. It has been surprisingly hard to find anything that works really well. Especially when it comes to the efficiency part. It is easy to store plenty of paints, but to store them in a way that actually helps your painting; that is harder. |  |
I did find a few different solutions though, and a few ideas on how to build my own. Of the ones actually made for this purpose, this one is a good choice:
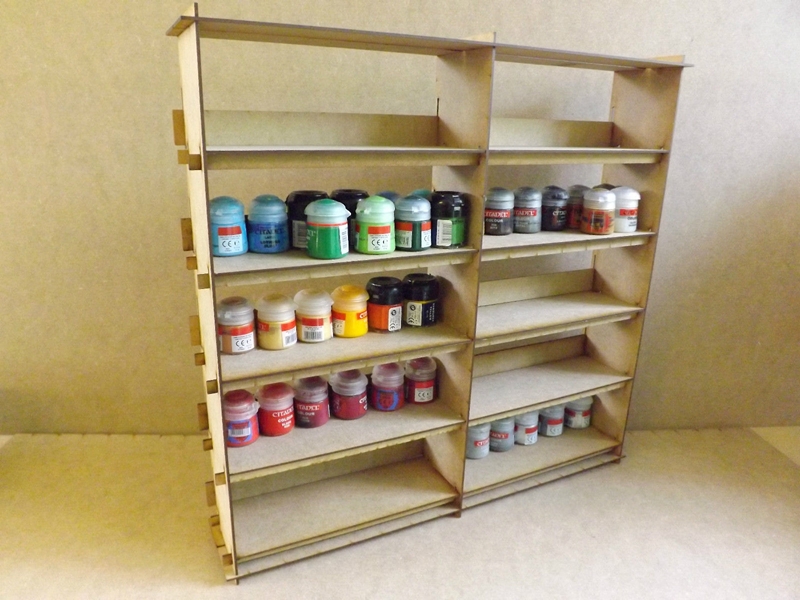
This one is made by Wargame Model Mods. You can find their ebay store here: http://www.ebay.co.uk/usr/wargame-model-mods.
My main issues with this one has been that the measurements does not fit my needs, I prefer a taller thinner shelf. It is also relatively pricey, especially with shipping. Well, as there aren’t many alternatives, the price is ok, I guess, but more than I really wanted to pay. Also, personally, I think it is a bit ugly – which could be solved with a paint job perhaps.
My main issues with this one has been that the measurements does not fit my needs, I prefer a taller thinner shelf. It is also relatively pricey, especially with shipping. Well, as there aren’t many alternatives, the price is ok, I guess, but more than I really wanted to pay. Also, personally, I think it is a bit ugly – which could be solved with a paint job perhaps.
| As I felt like building my own, I started searching for clever ways to build a shelf like this – and while it is easy to build a shelf for books, a shelf for paints that is efficient, that was harder. But eventually I found these things: | 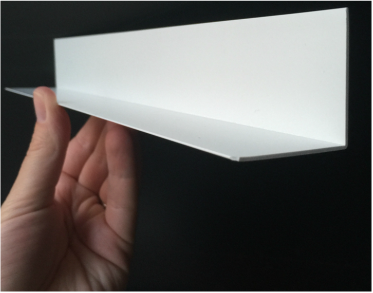 |
These are ordinarily used inside walls when you build houses, and thus not often seen. I happened upon picture of these by chance as I was looking at pictures of shelves online. I then asked a relative who works with building and construction, and a bit of carpentry, if he knew what these things were. Turns out he did. They are something called “plastic corner wall protectors”. They can only be found in specialty stores but are quite cheap – do a google search and see if you can find some near you.
They can be bought in a different measurements. These are 40 mm x 40 mm, just right for a citadel paint bottle.
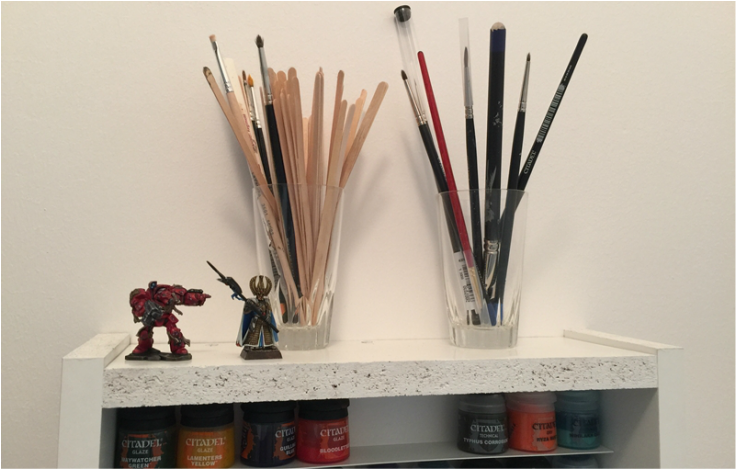
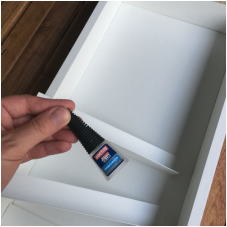
I also needed some sort of frame to fasten these to, of course. I decided I would build a complete frame with a back. The plastic shelves would then be fastened with glue to the back of this, while the frame held it together. The frame is not necessarily needed if you intend to attach it to a wall, but it does keep the paints from falling off the sides. Also, you can use the top to store more things, like this:
They can be bought in a different measurements. These are 40 mm x 40 mm, just right for a citadel paint bottle.
I also needed some sort of frame to fasten these to, of course. I decided I would build a complete frame with a back. The plastic shelves would then be fastened with glue to the back of this, while the frame held it together. The frame is not necessarily needed if you intend to attach it to a wall, but it does keep the paints from falling off the sides. Also, you can use the top to store more things, like this:
| Here is a picture of the boards I used for the assembly: These are ordinary shelving that you can buy in any larger hardware store. They can usually cut these to measure too. Oh, do not make the same mistake I did – make sure you have “fronts” with the white on them facing “outwards”. I got two double back sides for the top and bottom of the shelf. I painted these later, so it turned out ok… | 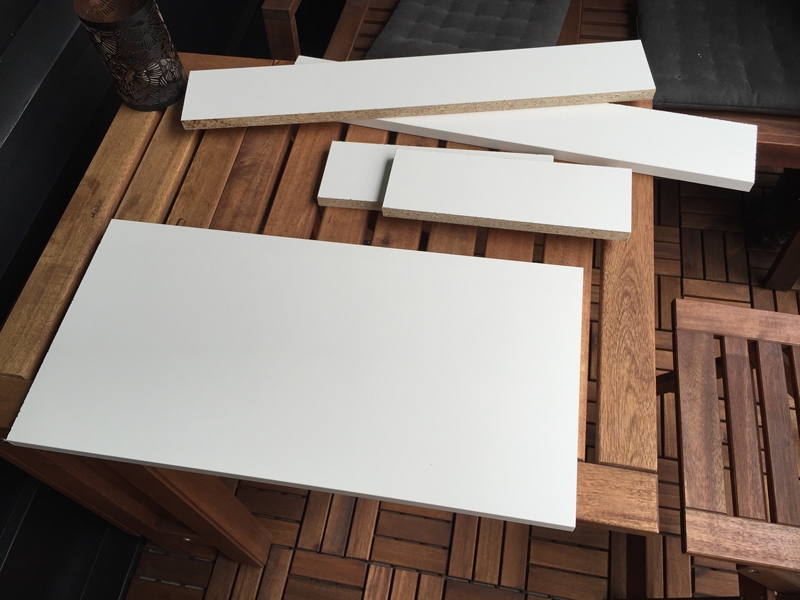 |
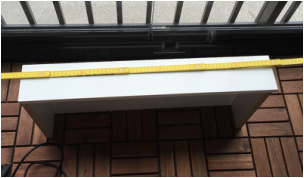
The measurements were these (in mm):
- 1 backside: 600 high, 300 wide
- 2 sides: 650 high, 100 wide
- 1 top: 300 long, 100 wide
- 1 bottom: 300 long, 100 wide
Each of the plastic corner protection, ie the actual shelves, were cut (or sawed, actually, but they can be cut if you have a sharp knife - be careful!) to be 295 mm wide (a little less so they would fit easily inside the frame).
Here is a quick rundown on how the shelf was built:
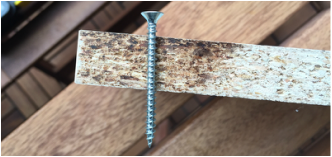
You will need, apart from the above mentioned, screws to assemble the frame and the back. Make sure the screws are of sufficient length and have a flat head like in the picture below.
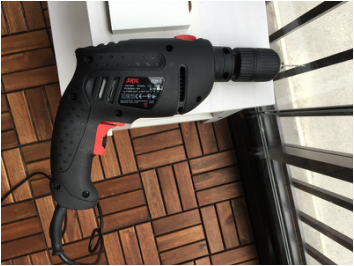
You also need a drill (and a screwdriver of course).
You also need a drill (and a screwdriver of course).
 |  |
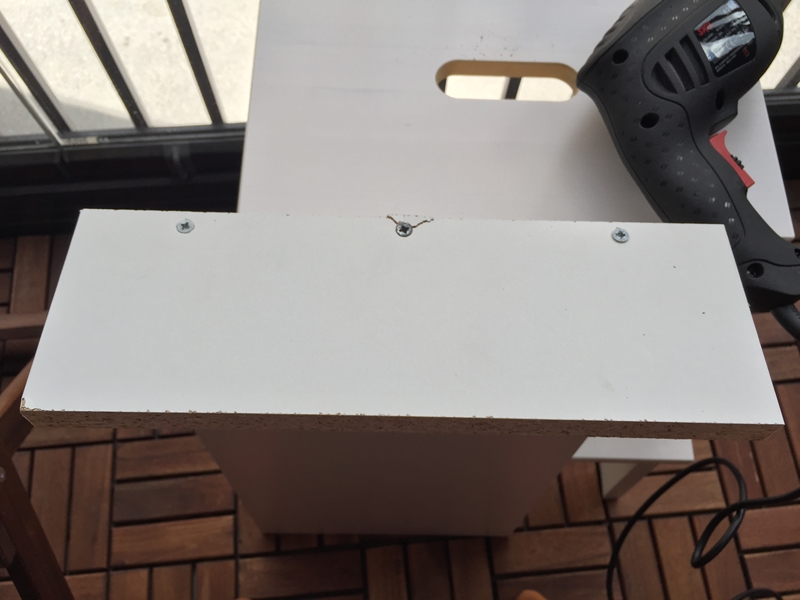
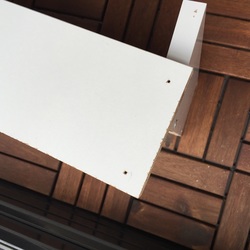
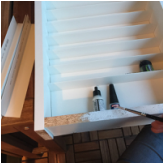
| I first drilled holes for the screws into the top and bottom. These holes should be slightly smaller than the screws you are using. You normally do not need to drill any holes into the backside, the part that you are affixing these pieces onto. Just be careful when you drill so that you do not drill into anything underneath the board. The little IKEA bench on the picture has a little hole in the middle of the topside of it, which makes it perfect for this job. As you can tell, I do not have a dedicated workshop, I am using the balcony of my apartment. | 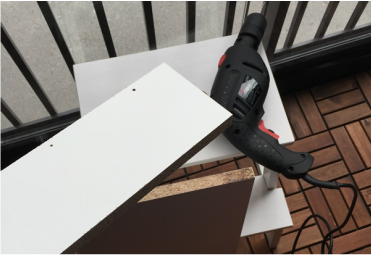 |
| Now, you want to screw the screws in, so that it is sticking out the other end by just a little bit. This will help with affixing the board to the backside. Again be careful not to damage anything with the pointy bits, yourself or furniture... | 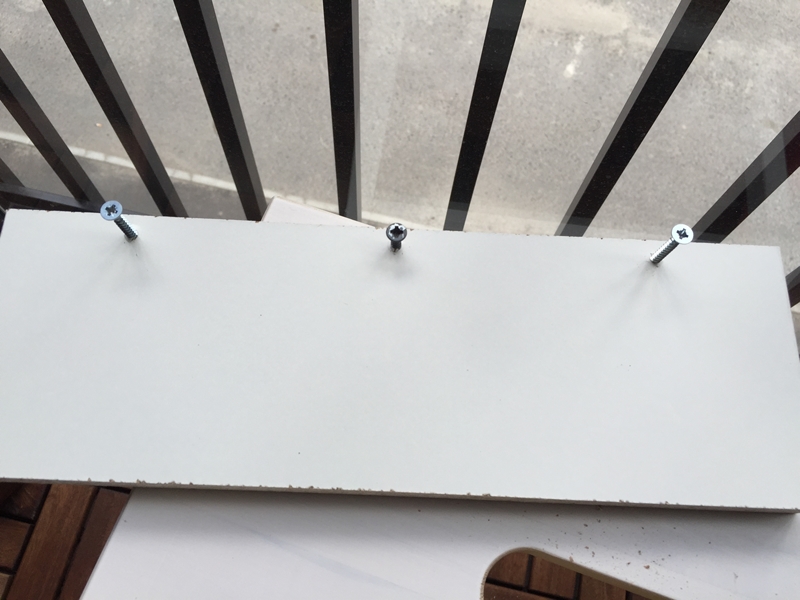 |
Now, press the board down onto the top, or bottom, of the backside board. Then screw it into place. Be careful that you do not make the same mistake I did below. The middle screw was fastened to hard and broke the board a little bit. This meant that this was the bottom side... so it does not show, but still...
Then repeat for the other side of the shelf.
Then repeat for the other side of the shelf.
 |  |  |
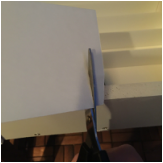
It was then time to do the sides of the frame. I decided to do two screws to the top and to the bottom, and two more along the length of the backside. Where you put these is not overly important. One thing I did keep in mind is that I wanted the sides to stick out a little bit at both the top and the bottom. The reason for that was twofold: 1, I wanted the sides to act as "feet" for the shelf. 2, I wanted to have slight "walls" at the sides of the topside, to keep stuff in place up there. This is of course a matter of taste, I guess that a flat top would be more aesthetically pleasing for some people. I'd recommend the "feet" though, because that is good if you want to place the shelf on anything sensitive (the screws might scratch a table surface otherwise).
 |  | 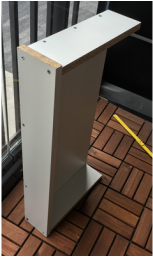 |
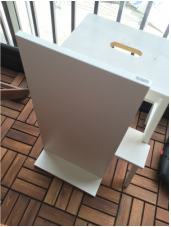
| Once both sides are assembled, the frame is done: | 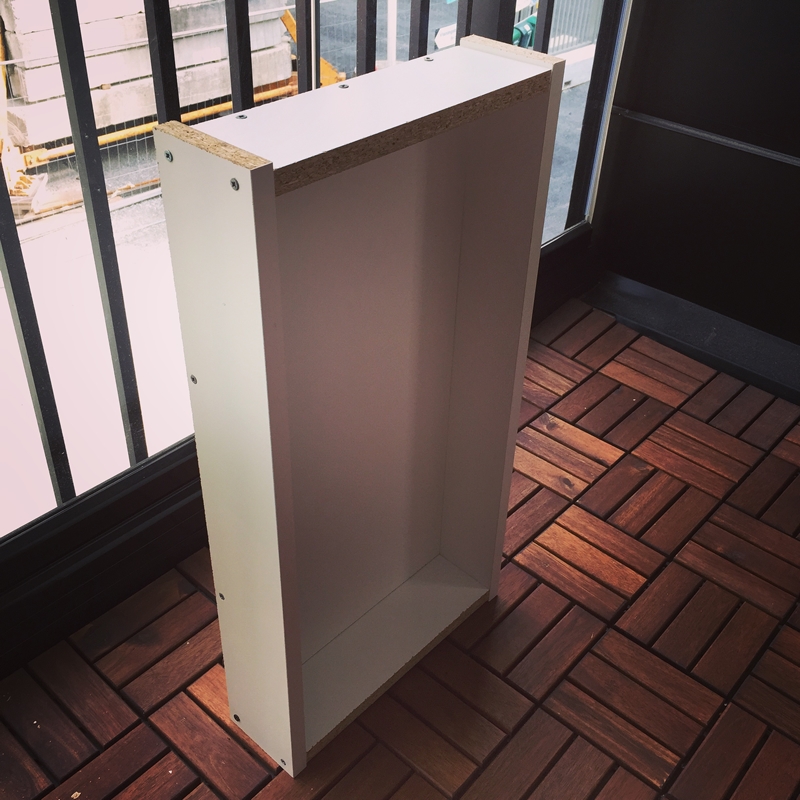 |
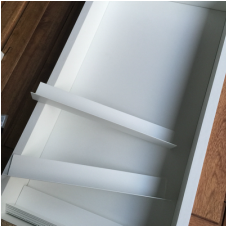
Now, it is time to set the shelves. At this point, if not before, you need to consider what kind of bottles you want to fit on these shelves and do a dry fit. You lay the shelves down and try it out with different bottles. When you have it all planned out, bring out some super glue. You can use screws for this too, but you do have a nice flat surface for glue, and I found that both easier and more pleasing to the eye in the end.
 |  |  |
I then painted all the rough sides white. As mentioned above, if you are clever when you buy and have the boards cut, you might not need to paint as many sides of these...
I also put a bit of scratch protection at the bottom "feet" of the shelf. These can be bought most anywhere I guess. This particular brand is one that you can cut pieces out of a mat and glue to the surface you want. But any kind would work. This part is obviously not necessary, but I like to protect my desk...
I also put a bit of scratch protection at the bottom "feet" of the shelf. These can be bought most anywhere I guess. This particular brand is one that you can cut pieces out of a mat and glue to the surface you want. But any kind would work. This part is obviously not necessary, but I like to protect my desk...
 |  |  |  |
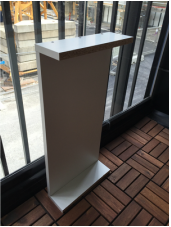
Here are a couple of pictures of the finished shelf:
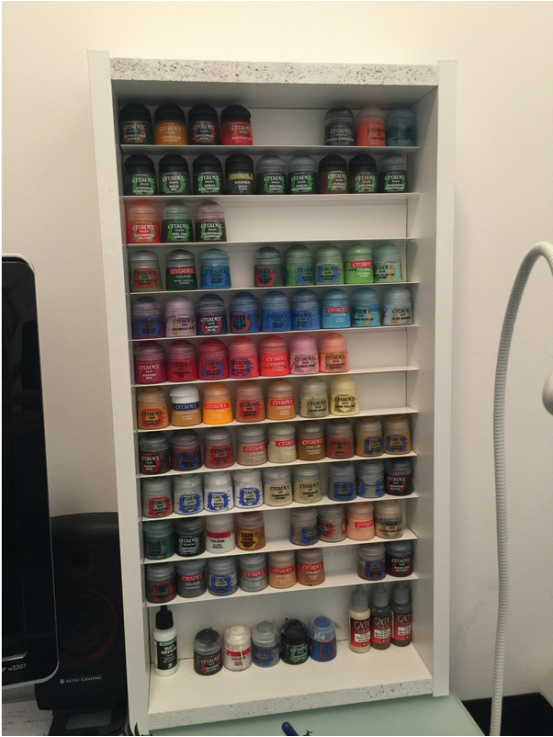 | 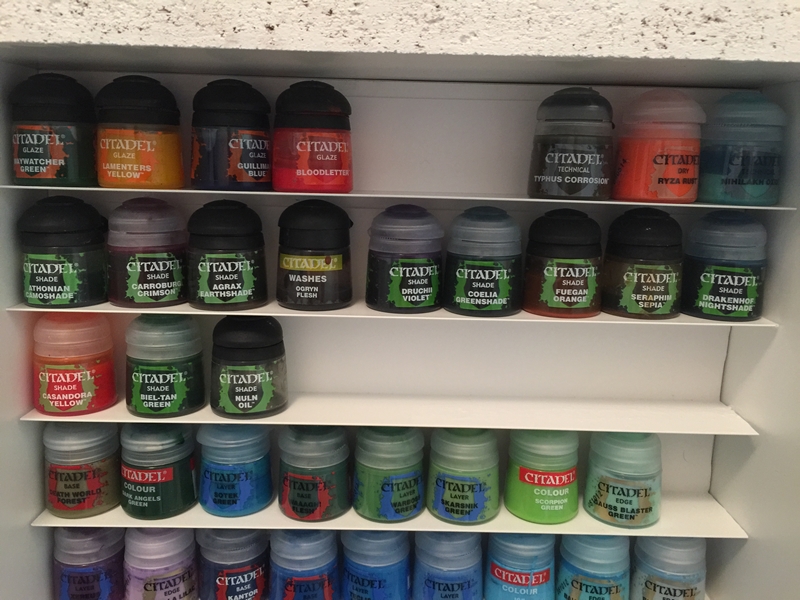 |
I think it looks wonderful with the thin thin shelves and it is VERY efficient! I am very happy with the end result. The actual building process took about two hours.
I hope you found this useful or entertaining. Please do ask if you have any questions. Follow "jesterpainting" on instagram for weekly hobby pictures and Jester Painting Studio on facebook.
I hope you found this useful or entertaining. Please do ask if you have any questions. Follow "jesterpainting" on instagram for weekly hobby pictures and Jester Painting Studio on facebook.
 RSS Feed
